Pajama pants for the kids
It’s been over five months since I blogged here, have you missed me? I sure missed you!! But just because I haven’t been blogging doesn’t mean I haven’t been busy. In fact, my busy-ness is why I haven’t been blogging. Then I got to the point where I was just overwhelmed by all of the blog posts I wanted to write. I will try to catch up, because if I can’t share the cool things I’ve done, then it’s not as satisfying to me.
My oldest kiddo had been asking me for over a year to sew him some “soft pajama pants”. The boy is totally into soft textures. I figured that as long as I was sewing pjs for him, I might as well sew them for all of the kids. Turned out that it was mostly an easy process.
Here’s how I made pajama pants for my kids (and another two pairs for a sibling pair of friends of the girls).


The first thing I did was make a pattern by taking a current pair of pajamas and tracing around them on a long piece of paper. then I added about an inch on the sides for a seam allowance, and two inches at the waistband and foot.

I chose fleece as my fabric for three reasons: 1. It doesn’t need to be hemmed, since it doesn’t fray. 2. Due to the stretch, an elastic waist isn’t needed. 3. It’s the perfect cold weather fabric.
I neglected to photograph the fabric after I cut it. To cut it, fold it in half right sides facing with the stretchy direction perpendicular to the fold. Line the pattern with the straighter side along the fold (the dip that sticks out on one side is not the side with the fold). Cut the fabric out, leaving the fold intact.

I also didn’t take a photo of the next two steps, but I will try to explain it accurately. (And if I make another pair, I will take photos of the missing steps and update this post).
Sew the inseam, from the dip of the crotch down to the leg on each of the two leg pieces.
Leave one leg with the right sides facing each other, and turn the other leg right side out. Tuck the turned leg inside the other leg and line up the leg seams you just sewed and pin from the waist to the crotch. Sew this seam to connect the two legs together and form the pants. Pull the leg from out of the other leg, and leave the pants inside out. Whew! I’m not sure how much sense that makes and I can’t find the link to the instructions I used when I made these. It almost makes me want to sew another pair just to get the pictures for this part.
I decided to use a drawstring to cinch the waist on the pants using buttonholes as the opening. First I marked where the holes would go on the front, as well as how they’d be place once the waistband was folded. I marked them equal spaces from the center seam so that they’d be even. The button holes only are going where the bottom marks are, the marks above are just to make sure that the seam that makes the waistband don’t interfere with the button holes.

Then I attached the buttonhole foot on my sewing machine, and set it up so that the buttonhole would be about ½” long. I love sewing buttonholes, it’s just so cool that it’s automatic once you have it all set up.

Check it out. I used a seam ripper to cut the fabric within the buttonhole. Now it’s time to sew the waistband.

Fold the waistband down so that the buttonholes won’t be sewn, and pin for sewing. Then with the pants inside out, sew the waistband together. The left buttonhole is lower than I had planned but it ended up working out okay.

Since these were for my daughter, I decided to make a braid from some of the scraps for her drawstring. If you go this route, make sure that the stretch of your fabric goes in the long direction. I took a long scrap, and then cut it into three pieces, leaving part of it connected at the top. I then stretched each piece to get it to curl and become thinner and longer.
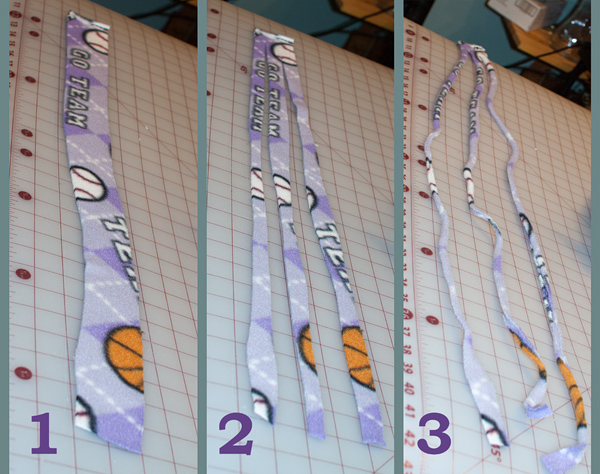
Then I used a clamp to attach it to a chair so that I could braid it.

Voila! Once the braid was finished, I tied both ends, and cut off the fabric where the top was connected.
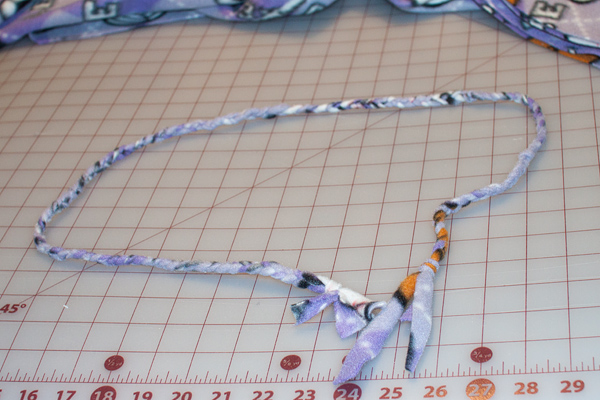
Using a safety pin, I fed the braid through one buttonhole, around the waist and out the other. I wish I had made it a little longer, just to make it easier for my daughter to tie.

The pants by themselves

And the pants I made for my other daughter. I used elastic in the waistband on these (as they were the first pair I made, and I didn’t think of the drawstring then).

For my son, I didn’t use a braid, I just used a long piece of the stretchy fleece, and tied it together.

The girls modeling their pants

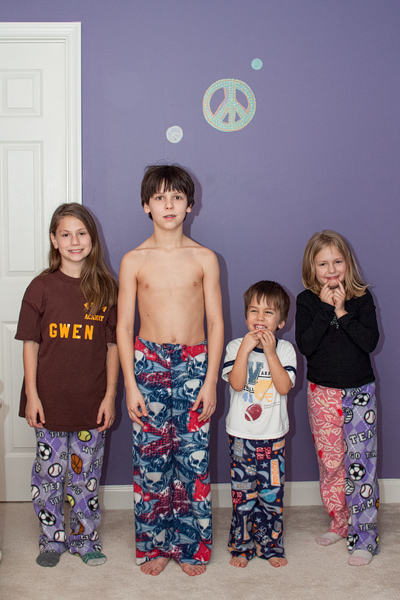
And all four kids wearing their pj pants on the one night I was able to get them together for the picture


Looks great! I want a pair! ;+)
well, you’ll have to trace your current pajamas and send me the tracing. 😉